Tuesday, May 31, 2011

Workshops in Australia


While in Australia, I taught a two-day workshop on electroforming and plating. I enjoyed the group and their enthusiasm. I especially appreciated their good humor when our copper plating solution was lacking the necessary acid needed for successful plating on the first day of class. It's not like I can travel with that stuff, so I'm at the mercy of local sources. I lost a bit of sleep that night trying to figure out how to rescue the pieces.

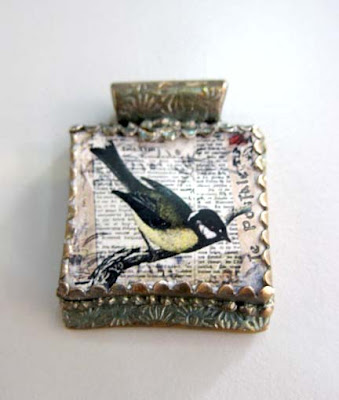
Luckily, Keith Lo Bue, a well-known jewelry artist and teacher came to the rescue. He was attending the class, and just happened to have some hydrochloric acid at home, which he brought in for day two. It worked great, and we were able to finish quite a few pieces. Then we proceeded to plate several of the pieces with gold, silver and nickel using prepared plating solutions. Check out the results in the photo above.

On the second day of the workshop, we etched on copper and then applied images on nickel silver. Then we riveted the pieces together to make mixed-media bracelets. I was so busy, I forgot to take pictures, but the projects were based on my sample shown in this photo.

Tuesday, May 24, 2011

Roz from Oz

After leaving New Zealand, I headed south to teach at the Eclectic Studio in Sydney, Australia. Roz Eberhard-Swan operates the studio, which offers jewelry-making classes in metal clay, polymer clay, resin and beadwork, just to name a few. On my first day in Australia, Roz arranged for me to take a boat tour of Sydney Harbor. The morning was perfect - clear and sunny.

In the afternoon, I walked along Pitt Street to check out the shops. Since it was Fall in the Land Down Under, so all of the new winter fashion lines were displayed. Surprisingly, I only bought one shirt, which was a good thing due to my impending luggage weight restriction to deal with on the flight home.


Since it was Easter weekend, the busiest shop downtown was Haigh's Chocolates. There was a long line just to get in the store. I checked back at the end of the day, and the line was shorter, so I stopped in. The chocolates were OK, but not much different from any other fancy chocolate shop, although none made it home to the family. Oops.

I still think places like See's Candies, headquartered in California, and Mrs. Cavanaugh's, made right here in Utah offer some of the best dipped chocolates to be found anywhere in the world, and I've done my best to sample chocolates in as many places as possible!


My one free day alone in the city was one I will always remember. Sydney is a place I will definitely visit again.

Sunday, May 22, 2011

Fingers Jewellery in New Zealand

On one of my free days in New Zealand, Dan and I took a bus to downtown Auckland to visit museums and galleries. Our first stop was to an art jewelry gallery called "Fingers," which features fabulous mixed media jewelry.

I had visited the online site for years, and didn't realize it was in Auckland until the night before we went there. It was exciting to visit in person. One of my favorite jewelry artists is Karl Fritsch. I am admiring his rings in the photo below.

Dan remarked to the gallery keeper, "These look like they are made from Precious Metal Clay." She shuddered and said, "Noooooo," and then explained that they were made from silver and gold (which, incidentally, precious metal clay is made from).

She is not unusual in her aversion to metal clay. Jewelry galleries often shun the material. I don't get it, because other pieces in the gallery were made from thread, old cell phones, plastic shopping bags and even wiggle eyes! Yes, the plastic ones you glue on children's craft projects. Why is a wiggle eye more valid than a hand-sculpted piece of fine silver or gold?


Despite the gallery keeper's attitude toward Precious Metal Clay, we enjoyed our visit to the gallery. The unique jewelry there was a great source of inspiration.

Sunday, May 15, 2011

Sherri and Dan's 25th!


Sherri and Dan celebrated their 25th wedding anniversary in New Zealand on May 1st, where Sherri was teaching classes. Here is a picture of them back on the big day in 1986.

(Notice the Princess-Diana inspired sleeves!)

Sherri and Dan are an amazing team, working together for a quarter of a century, raising a family and supporting each other in their careers. Dan's day job is engineering, and he is also the brains behind the E-3 Etch and the E-3 Electroform machines. He can frequently be found assisting in Sherri's classes. Theirs is a true partnership. Congratulations, Sherri and Dan!

Thursday, May 12, 2011

New Zealand Student Projects


One exciting thing about teaching both at home and abroad is seeing the creativity demonstrated by the students with the materials offered in class. This was the first venue where we used resin clay in conjunction with metal clay. Recently we started selling our own brand of clay called KlayResin. Everyone was excited about using the clay. The students made amazing pieces. These are KlayResin Porcelain with toner images set in Art Clay Silver.

Ingrid Schloemer

Cathie Wells

Clare Gunn

Ingrid Schloemer

Tuesday, May 10, 2011

Who Talks Funny?

Dan joined me part way through my trip to New Zealand, and within hours of his arrival, a competition began between him and Anne Marie about which one of them had the funniest accent and colloquialisms. I think it all started when Anne Marie's daughter Alexia thought the word "graham crackers" was hysterical (she heard it on an American teen movie), so Dan brought her some when he arrived. This was followed by several days worth of new words and phrases to suss out. ("Suss" being one of Dan's newly acquired words.) One such discussion was launched over a misspelling on a menu "Fagita". "Fajita" as it should be spelled could be pronounced several ways, further complicated by the different accents in play. I couldn't help but think of the old tomato song in a new context (you say "faheeta" I say "fa-gita"). In our final etching class, Anne Marie proudly presented Dan with a souvenir - a neatly etched comment for him to treasure.

One one of our free days, Anne Marie and Peter arranged a day trip for us to go with them and their friends, Richard and Alison, to Waiheki Island, which is stunning. We visited a quiet beach near Richard and Alison's vacation home, and enjoyed nice lunch at a local vineyard.


Next, we headed to the earthquake-devastated city of Christchurch. We taught a group of optimistic attendees who were excited to be creative despite having to endure aftershocks and having to boil drinking water. We experienced a 5.3 aftershock while we were there. The pavement moved from side to side under out feet. I've never felt the earth move like that. Dan documented some of the damaged buildings as he made his way around the city in search of an open museum or cafe. Very few tourist attractions were operational.

In tomorrow's blog, see some of the amazing pieces created by students in my class.


Kiwis (not the fruit)

I see now why people love New Zealand. It was green and tropical and from my perspective, it was like Seattle, where I grew up, mixed with Hawaii. The people were really polite--for example, saying "thank you" to the city bus driver as they got off the bus, and then drivers stopped for pedestrians at the crosswalks even if they weren't trying to step out.

Auckland was my first stop to teach for Anne Marie and Peter Grace from Art Clay NZ. they invited me to teach there, and then to travel to Christchurch for another round of classes. The first stop, right after a 15-hour flight, was to the beach near Anne Marie's home. As we walked along, I was intrigued by of the small seashells, twigs and pods native to New Zealand. I became completely obsessed in my search for potential specimens for electroforming, stopping to stuff my pockets with shells like a five-year-old. The seashell hunt, combined with my jet lag, must have scared Anne Marie a little. Within a day, I would be expected to lead a coherent workshop. My side of the conversation consisted of "Huh?" or "Can you repeat that?" while stopping suddenly to pick up one more shell. Later, I taught her about the wonders of copper electroforming, hoping to validate my persistent scavenger hunt.

I met a group of talented Art Clay instructors and jewelry designers in Tacapuna who attended the first class. The workshops consisted of a full day each of electrical etching, resin clay and image transfer techniques on Art Clay Silver. Everyone found unique ways to implement these mediums into their work.

I thought this piece by Ingrid Schloemers was a nice design. She used ITS to transfer a seashell image.

Wednesday, May 4, 2011

New Use for ITS


Sherri originally developed ITS for transferring images onto non-porous surfaces like metal. But there is another bonus use for the product that she’s been using to get fantastic results. By mixing ITS with pigment powders, you can create a custom palette of colors that you can use to paint on non-porous surfaces. The example here shows colors applied to a fine metal clay bracelet. So if you have some ITS solution and pigment powders, it’s time to get creative. It’s best to practice on some bottle caps or other metal surface to get used to working with the paint before you start on your jewelry piece.

Steps for applying color to metal using ITS:

1. Mix a very small amount of pigment powder with a drop of ITS with a toothpick on waxed paper. A little goes a long way. Use less powder for a transparent watercolor effect, or add more for opaque color. (Wear a respiratory mask to avoid inhaling pigment powder.)
2. Use a toothpick or small paintbrush to apply the paint to your surface. It dries quickly, so work with small amounts. Colors can be layered or mixed as with any other type of paint. If you make a mistake, act quickly and scrape the paint off. After it is set, you will have to sand it off. (For metal clay pieces you can fire the piece to remove the paint.)


3. If you just want color only in the recessed areas of your surface, as in these examples, paint the entire surface first, then scrape the paint off the raised areas with a toothpick after about 10 minutes, when the paint is almost set.
4. Let the ITS paint dry completely. Set the paint with a heat gun for about one minute. This will not only set the paint, but also bring out the color and clarity of the pigment powder for an enamel-like finish.