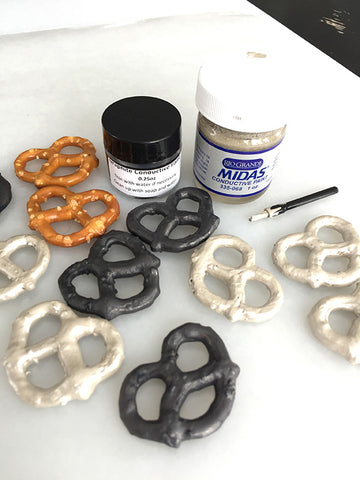
I’ve been promising to talk more about conductive paints, the differences in paints and what factors vary performance. Although there are several types on the market, my two favorite paints are: water-based graphite paint and solvent based silver paint. Both of these paints have appealing attributes and depending on what you are electroforming you may prefer one over the other. I performed a side by side test using pretzels as a representation of any organic object you might electroform.
All of the pretzels were prepped and coated with two coats of water-based varnish using one of our disposable firm brushes. Care was taken to cover the salt on the pretzels as well as to fill little pockets where the surface was chipped or broken to insure complete sealing of the pretzel.
Both sets were covered with one thin layer of the respective conductive paint. The graphite paint was easier to apply than the silver and held detail well. The silver paint was thicker and dried quickly. In hindsight I might have had better results to thin the silver paint with lacquer thinner to remedy this. (You can buy thinner specifically for silver paint.) I was able to rinse the graphite paint from the brushes with water. However, I tossed the brushes that were used with the silver paint. In either case the brushes were disposable so it wasn’t a big deal.
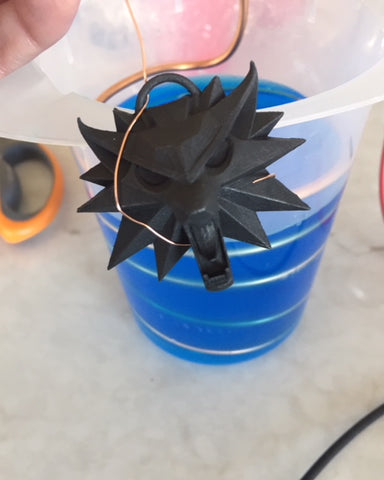
After the pretzels were dry, they were ready to electroform. The silver coated pretzels were waterproof so they could be handled with wet hands and was not as vulnerable to washing off in the plating solution. Graphite is really sensitive to moisture so care was taken to keep the graphite coated pretzels dry and then to make sure the current and power were on before submerging the pretzels into the electroforming solution.

(
Click here to see a larger version of this image)
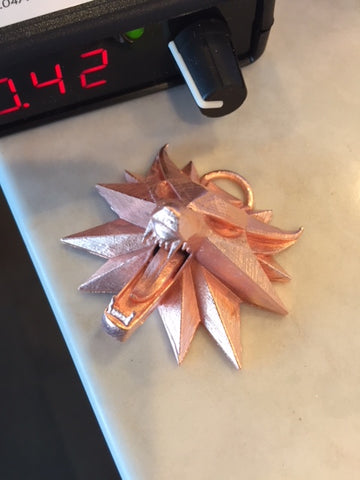
A copper conductive wire was attached to each of the first samples (one silver pretzel and one graphite pretzel) and each was lowered it’s own beaker to electroform. As with most projects, I turned the current up a bit to get the pieces going for about 10 minutes before lowering the current to complete the electroforming session. The first thing I noticed is that the silver paint allowed the current to flow around the pretzel quickly and uniformly. The graphite took a bit longer and I watched as the copper progressed to cover the surface. Graphite is more sensitive to current that is set too high or too low more so than silver. For this first round I had the current set at 1A which was too high for the graphite paint. The wire built a crust on it quickly which then prevented the current from effectively coating the pretzel. I found that .5A was better for the subsequent samples. I was able to remove the graphite pretzel after 10 minutes and replace the wire with a clean one which helped stop the build up and allowed me to continue electroforming the same piece without failure. Both pieces were bright and shiny after several hours.
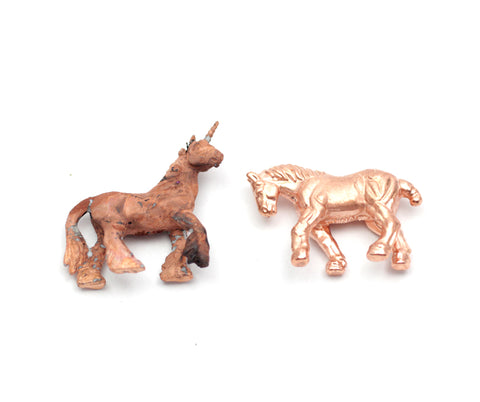
For the remainder of the samples I was amazed to see that even though the pretzels were coated with different paints and were electroformed separately, the finishes looked identical. As you can see on the 2nd set of pretzels they both look as though the copper picked up a patina. They both plated uniformly. The copper could be polished later to change the color if desired.
For the 3rd round, I added several droppers of brightener in both beakers to try to get the bright pure copper color back. The silver paint was more forgiving of the chemistry change and plated just fine. The graphite sample was slightly more “dull” or “flat” in sheen and also plated with some cracks and lines on the surface. The brightener seems to have thrown things off a bit in the beaker on the graphite test side. Interestingly enough the subsequent pieces did better with the graphite side (I’m assuming the brightener became less potent over time with use).
The last set of pretzels worked out better than the 3rd round. Even though there was a “patina” color on both samples, they were bright and shiny. The brightener seemed to mellow to a good level and the solution was in good shape. At this point, both beakers had quite a bit of debris in the bottom of each and so I strained the solutions through a coffee filter. The solution was still good to go, but won’t last indefinitely as it will eventually need more acid or to be replaced altogether.
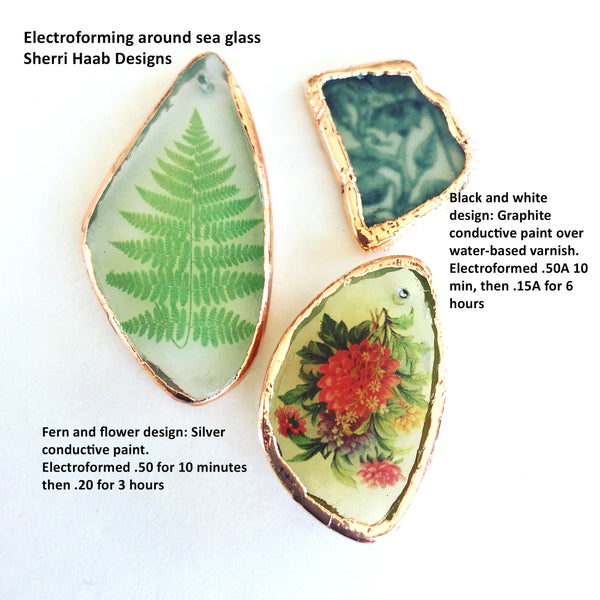
In summary, both paints performed well to conduct electricity and to allow even plating. Here is what I would say are the pros/cons of each. I personally use graphite most of the time. I use silver occasionally for pieces where I’m at risk for the graphite washing off such as plating on smooth glass. Although you can paint on glass with graphite if you paint an undercoat of varnish to help it stick. See my post about electroforming on Sea glass. For more information on other paints see my comparison pdf here:
Comparing Conductive Paints for Electroforming.
Comparing graphite vs. silver paint:
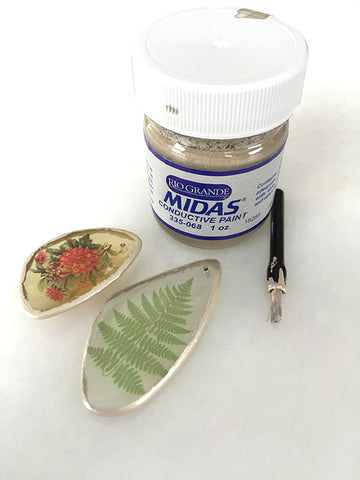
Silver Conductive Paint - solvent based from Rio Grande
Pros:
- Excellent conductivity-forgiving of wide range of current
- Initial plating is fast
- Good adhesion to smooth surfaces like glass
- Made with silver
- Good support from Rio Grande and widely used
Cons:
- Thicker than water based paints, fine details may suffer
- Expensive-follows the silver market price
- Hard to clean up, must use solvent based paint remover to clean brushes, etc. contains Butyl Acetate
- Safety precautions: respiration, skin and ingestion warnings
- Flammable shipping restrictions
Graphite Paint - water based from Sherri Haab Designs
Pros:
- Excellent conductivity
- Small particle size to retain detail
- Inexpensive in relation to silver
- Can be thinned down and cleaned up easily with water
- Works very well for fine work using an air brush when thinned down
- You can see where electroforming is forming during process (easier to see than copper conductive paints)
- Can be shipped by air and overseas and less hazardous than silver paint
Cons:
- Sensitive to current levels (too much or too little current may arrest the plating process)
- Does not stick well to smooth surfaces like glass, must use a “tacky” base such as water based varnish or white glue which will help the graphite paint to stick.
- If it is thinned down with too much water it will bead like a watercolor paint and not adhere well when painted.
- Contains ammonia, which some people may be sensitive to in concentrated amounts.
- Respirator must be worn when spraying for industrial use
- Some people can be sensitive with dermal contact. Gloves will prevent contact


.JPG)
